
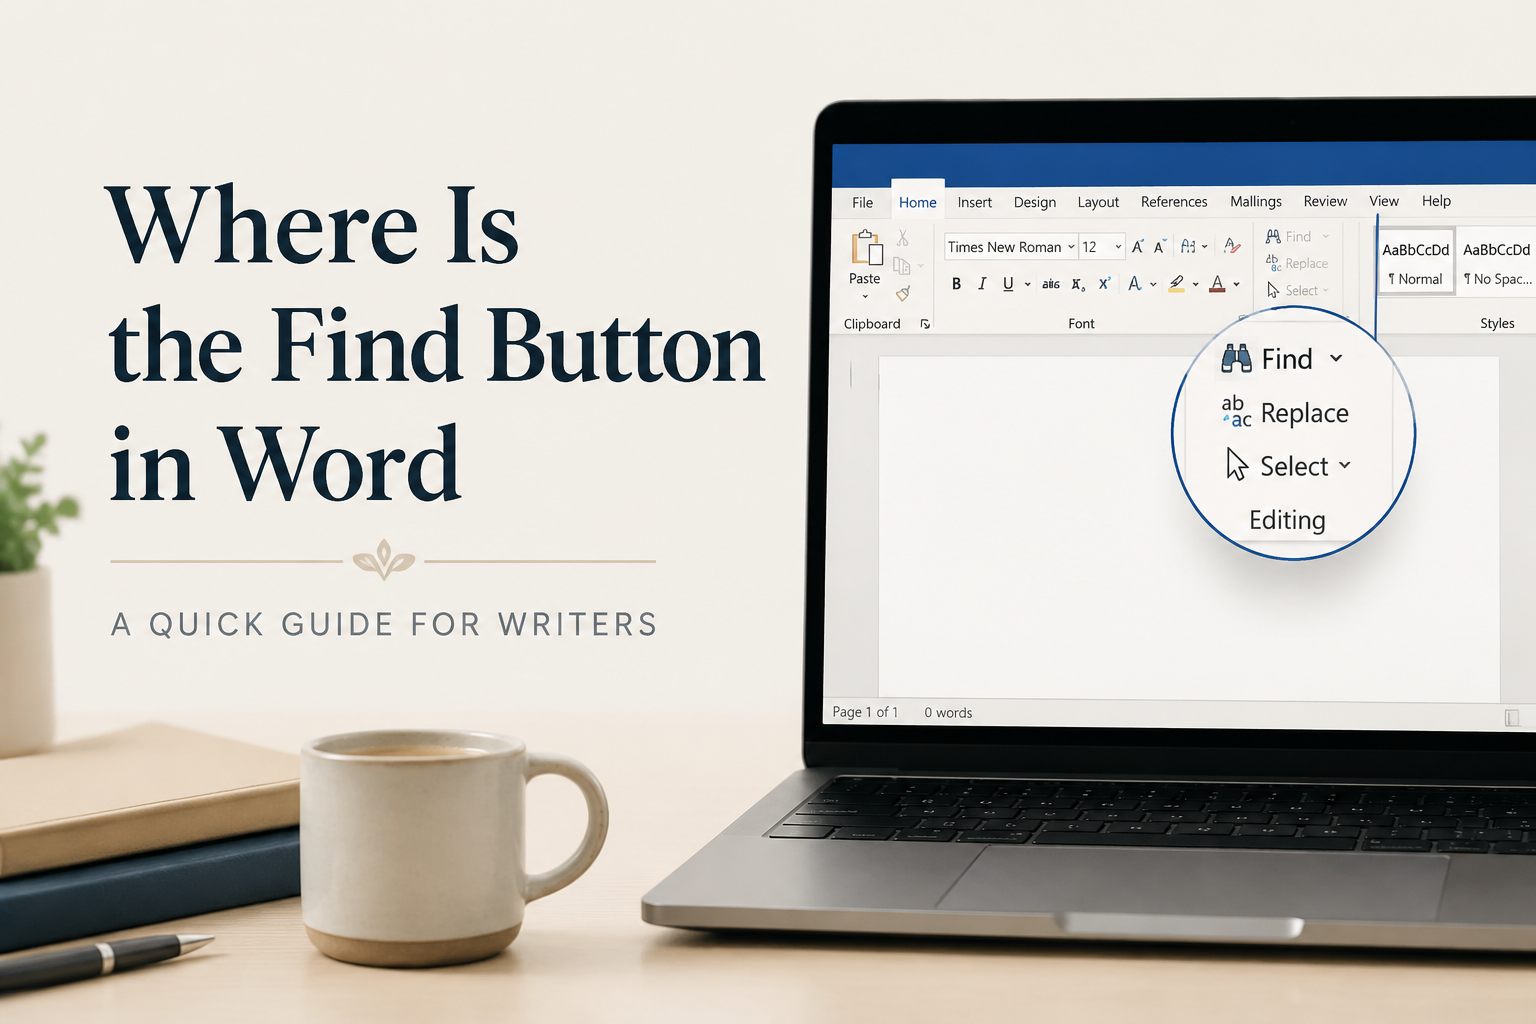
When you are hunting for a name you used once in chapter 2, the question “Where is the Find button in Word?” stops being basic and starts being urgent. The Find feature is the fastest way to stay in a drafting rhythm, because it keeps you from turning revision into a scavenger hunt.
I treat Find like a writing tool, not a menu item. If you know where it lives on your version of Word and you know the shortcuts that bypass the ribbon entirely, you will move through a 90,000-word manuscript with the kind of control that makes line edits and continuity checks feel possible again.
Here is the practical answer, plus the ways I actually use Find when I am editing fiction and nonfiction for publication.

Table of Contents
Where Find Lives in Word on Windows and Mac
Word’s interface has changed over the years, but Microsoft keeps Find in roughly the same place because everyone uses it. The confusion usually comes from three things: the ribbon tab you are on, the window width hiding icons, or the difference between Windows and Mac layouts.
Find on Word for Windows
On Windows, the Find button is usually on the Home tab, toward the far right, in the Editing group. You will see Find, Replace, and sometimes Select.
If your Word window is narrow, the Editing group may collapse into a single icon or a small drop-down menu. When that happens, you might see a magnifying glass icon rather than the word “Find.” Widen the Word window or click the collapsed icon to reveal Find.
You can also reach it from the menu: Home tab, then Find. If you want the Navigation pane, choose the Find drop-down menu and look for “Advanced Find” on your version.
Find in Word for Mac
On Mac, you can use the ribbon path, but I prefer the menu bar because it stays stable. Go to Edit, then Find, and you will see options like Find, Find Next, and Replace.
On many Mac versions, Find also appears on the Home tab in the ribbon, typically toward the right side. If you are switching between Word, Scrivener, or Google Docs, the menu bar route reduces the “where did it go” moment.
The Fastest Path When You Are Drafting
If you are drafting and you break your flow to aim for a button, you are doing extra work for no reward. I use keyboard shortcuts as my default, then I fall back to the ribbon only when I need a specific dialog box.
The Shortcuts That Beat the Ribbon Every Time
Writers who revise efficiently do not do it because they are more disciplined. They do it because they reduce friction. Find is a perfect example.
These shortcuts work across most recent versions of Word, and they are worth memorizing the way you memorize your protagonist’s voice. Microsoft documents the main shortcuts in its support pages, including Find and Replace on Windows and Mac. You can confirm the shortcut list in Microsoft’s Word keyboard shortcuts reference.
Find and Navigation Pane
Windows: Press Ctrl+F. This opens the Navigation pane and drops your cursor into the search box. For manuscript work, this is the version of Find I use most because it shows results as a list you can jump through.
Mac: Press Command+F to open the Find box. Depending on your Word version, you may see a small search field at the top or a find bar in the document window.
Replace for Revision Passes
Windows: Ctrl+H opens Find and Replace directly. When I am normalizing formatting, swapping double spaces, or fixing a repeated typo, I go straight here.
Mac: Command + Shift + H often opens Replace, though some setups route Replace through the Edit menu. If your shortcut differs, check Word’s keyboard shortcut settings on your Mac, because it is worth having Replace one muscle memory away.
Find Next Without Reopening Anything
Windows: F4 repeats your last action, and in many Find workflows it jumps to the next result. You can also use Enter in the Navigation pane results list to move forward.
Mac: Command + G typically moves to the next result after you have searched.
Find Versus Replace Versus Navigation Pane
Word offers multiple “find” experiences, and knowing which one you are in changes what you can do. This distinction matters for authors because you are rarely searching for a single word once. You are searching across patterns: character names, timeline markers, point of view slips, formatting artifacts from a copy edit, and continuity problems that only show up when you see every occurrence in one place.
Find in the Navigation Pane
The Navigation pane search is ideal for jumping around fast. If you type “Marla” and see 68 results, you can scan the snippets and spot the one where you accidentally wrote “Maria” without opening 68 separate find-next steps.
This is where I do continuity work: I search for a character’s name, then their last name, then their nickname. I also search for specific props or settings that should not teleport, like “blue notebook” or “silver ring.”
Advanced Find for Precision
Advanced Find gives you control over match case, whole words, wildcards, and special characters. If you are cleaning up a manuscript, that control is the difference between fixing a problem and creating a new one.
For example, searching for “he” without whole-word matching will light up “the,” “her,” and half your book. Whole-word matching cuts the noise. Match case can help if you use “Dad” as a proper noun in dialogue, but “dad” as a generic noun elsewhere. Treat that choice consistently, because readers notice inconsistency even when they cannot explain what feels off.
Replace When You Have a Controlled Change
I use Replace when I have a change I can define tightly. If you are changing “Gray” to “Grey,” or “toward” to “towards” for a UK edition, Replace does real work. If you are trying to fix a voice problem, Replace is the wrong tool, and it will cause damage in places you do not expect.
When you do use Replace All, use a safety net. Save a new version first. Word’s AutoRecover helps, but you should treat global changes like you would treat deleting a scene that supports the climax. You can do it, but you want the option to put it back.
Author Use Cases That Actually Save You Hours
Find is not about locating a word. Find is about controlling your manuscript. When you write long form, small inconsistencies pile up until they look like “I guess I will fix it later,” and later turns into a weekend you did not plan to lose.
These are the Find passes I rely on because they catch problems readers and reviewers will call out. I am talking about the one-star “typos everywhere” review that never mentions your plot because the reader never relaxed enough to enjoy it.
Continuity Checks for Names and Spelling
Run the Find feature for every proper noun that matters: your main cast, towns, invented tech, magic terms, and organizations. If you have “Katerine” once and “Katherine” everywhere else, you will not catch it by eyeballing. You will catch it by searching both spellings.
This is also where series writers win. If book one established “The Council of Nine,” you do not want book two drifting into “Council of the Nine” because you got tired and your fingers took a shortcut. Find keeps your internal canon stable.
Formatting Sweeps After Copy and Paste
Authors paste from emails, Google Docs, critique group notes, and old drafts. Word tries to help. Word also creates weird artifacts, especially with spacing and smart punctuation.
My standard sweep includes searching for double spaces, extra paragraph marks, and inconsistent apostrophes in contractions if I imported text from different sources. The most common cleanups are “two spaces after a period,” stray tabs, and a mix of hyphens and en dashes in number ranges. Use Replace for the mechanical stuff, then skim the results where meaning could shift.
If you want a dependable list of special characters you can search for in Word, Microsoft documents these “Find What” codes and special search options. The exact menu labels vary by version, but the underlying tools stay consistent. Check Microsoft’s Find and Replace support page for the current reference.
Revision Flags You Can Search Later
If you do not already consistently mark revision issues, start doing so. Pick one marker that never appears in your actual prose, like “TK” or “TODO,” and use it every time you spot a problem you cannot solve in the moment.
Then, near the end of your draft, use Find for that marker and resolve each flagged spot. This habit is one of the easiest ways to finish a manuscript without losing your drafting pace. It works because you are not trusting your memory while you are tired.
In my experience, this simple Find pass is the difference between “I think I fixed everything” and “I know what is left.”
When Find Fails and How to Fix It
Sometimes the Find button is right where it should be, and it still feels like it is not working. Most of the time, the problem is scope, formatting, or hidden characters. If you write books, those are common because your documents are long and your edits are messy.
Search Scope and Hidden Sections
If you are searching inside a header, footer, footnote, comment, or text box, the normal Find may not behave the way you expect. Click back into the main body text, then search again. If you are using the Navigation pane, confirm where your cursor is positioned and that you are searching the document, not a field.
For nonfiction authors using tables, callouts, or sidebars, this matters even more. Word treats those as separate structures. You may need to click into the table or text box before Find will target it.
Match Case and Whole Words Tripping You Up
If Find returns no results and you know the word exists, check whether Match Case or Whole Words is turned on. Advanced Find keeps its settings, so you can forget you toggled something during a previous pass and then spend ten minutes doubting your own manuscript.
I reset the search options when results look wrong. It takes five seconds, and it prevents a silly spiral.
Wildcards and Smart Punctuation Issues
Wildcards are powerful, and they also create “why is Word doing that” moments when you forget they are on. If you used wildcards to fix a formatting problem and you left that setting enabled, plain searches can behave strangely. Turn wildcards off and search again.
Smart punctuation can also bite you. If you search for a straight quote character but your document contains curly quotes, Find may miss it depending on settings and what you entered in the search box. When I am doing a punctuation consistency pass, I copy the exact character from the manuscript into the Find box to avoid mismatches.
FAQs for Where is the Find Button in Word
Why do I only see a magnifying glass and not the word “Find”?
Your ribbon is collapsing the Editing group because the Word window is narrow or your ribbon layout is condensed. Expand the window, or click the magnifying glass icon or the collapsed Editing drop-down menu. Find is still there; Word is just hiding the label.
What is the fastest way to open Find while I am writing?
Use the shortcut. On Windows, it is Ctrl+F, and on Mac, it is Command+F. I treat this as non-negotiable muscle memory because it keeps you in your drafting and revision rhythm.
Should I use Replace All on a book-length manuscript?
Use Replace All when the change is mechanical and tightly defined, such as swapping double spaces or a consistent misspelling. Save a new version first, then use Replace All, then spot-check several occurrences across the manuscript to confirm you did not create unintended edits.
Finding Words Is Editing Control
Once you stop hunting for the Find button and start treating Find as a core editing tool, your revision process gets calmer. You will spend less time scrolling and more time making decisions that actually improve the reader’s experience.
If you write in Word and you also draft with tools like QuickWrite from Adazing, keep the mindset consistent across your workflow. Draft quickly, mark issues with a searchable flag, then use Find and Replace to clean the manuscript with intention before you format for KDP or send the file to an editor.
