
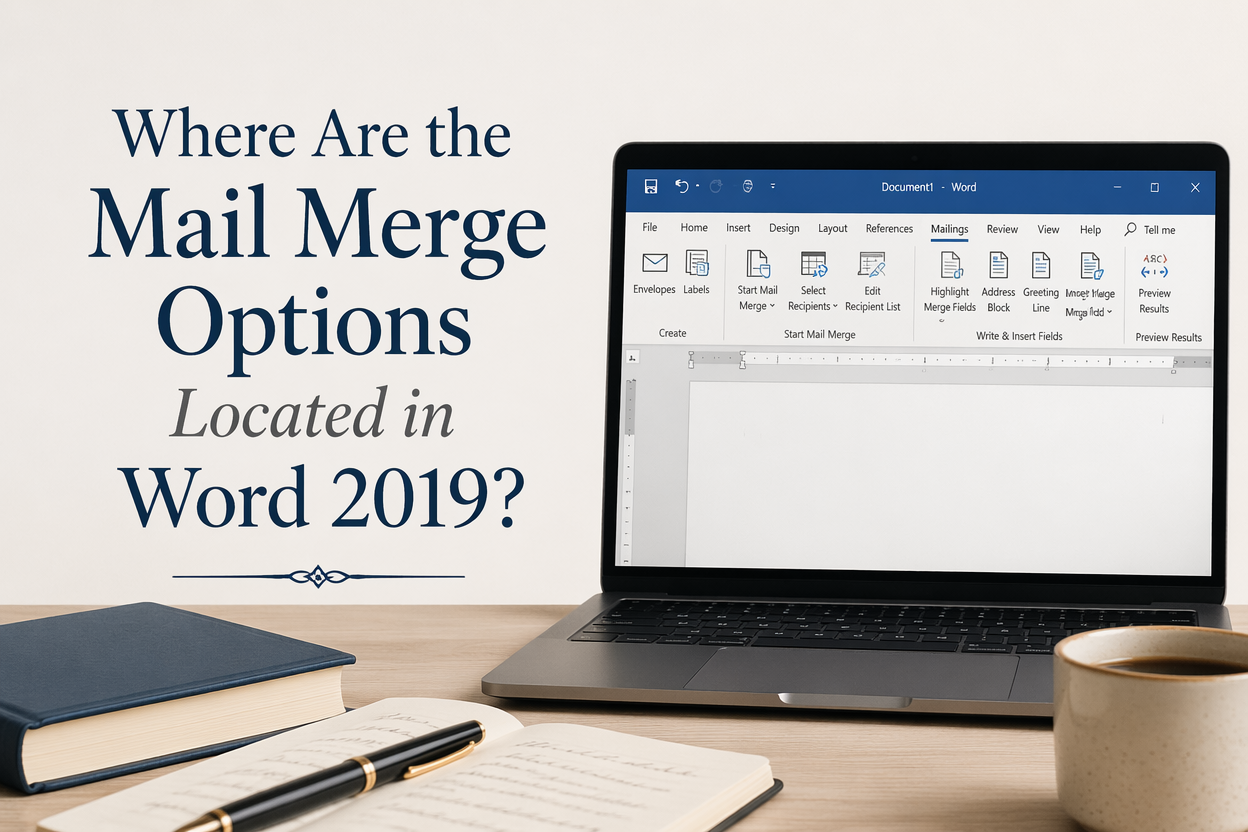
If you’ve asked, “Where are the mail merge options located in Word 2019?” before, you are usually one click away from saving yourself an hour of copy-paste misery. In Word 2019, Mail Merge lives on the Ribbon under the Mailings tab, and once you know what to look for, it becomes a repeatable production tool for author life.
I see authors avoid mail merge because it feels like office admin work, and that is exactly why it matters. When you are sending ARC invites, newsletter swaps, launch team instructions, or signing event labels, you do not need artistry. You need consistency, speed, and fewer chances to get someone’s name wrong.
My goal here is simple. I want you to know where the controls are, what each cluster of buttons actually does, and how to use them for the kinds of documents authors send all the time.
Table of Contents
Mailings Tab Location And What You Should See
The Mail Merge tools are located on the Ribbon in Word 2019. Look at the top of Word for the row of tabs like Home, Insert, Design, Layout, References, and you will see Mailings right there.
If you do not see it, it is usually one of three issues. The Word window is too narrow, your Ribbon is customized, or you are in a view that hides the full interface.
Finding The Mailings Tab On A Crowded Ribbon
On a smaller screen, Word compresses the Ribbon. The tabs still exist, but they can slide into a drop-down menu, or you might need to click the double arrow to expand the Ribbon. If the top area looks thin and you only see tab names, click any tab name and the Ribbon should expand temporarily. If you want it pinned open, use the Ribbon display options in the upper right and choose the full Ribbon view.
Restoring Mailings If It Was Removed
If you customized Word at some point, Mailings might be unchecked. Go to File > Options > Customize Ribbon. On the right side, you will see a list of tabs. Confirm that Mailings is checked. Click OK, then look again.
What “Mail Merge Options” Means In Word 2019
Authors often say “mail merge options” when they mean any of these: choosing the document type, connecting your recipient list, inserting fields like First Name, previewing what it will look like, and finishing the merge to print or email. In Word 2019, those functions are organized into groups across the Mailings tab. Once you recognize the groups, the tool stops feeling like a maze.

Mail Merge Groups On The Ribbon And What They Control
Open the Mailings tab and scan left to right. Word 2019 breaks the controls into functional groups. You do not need to memorize every button. You only need to know which group answers which problem.
Create Group For Envelopes And Labels
The Create group is where Word puts Envelopes and Labels. This is the part that authors miss when preparing signed bookplate labels, mailing labels for paperback orders, or media mail shipments. If you are doing anything sticker-related, start here, not in the merge wizard.
What to do: Click Labels, pick your label vendor and product number, then decide whether you are printing a single label or a full sheet. Once the label document is created, you can merge names and addresses into the label layout.
Start Mail Merge Group For Document Type And The Wizard
The Start Mail Merge group is where you choose what you want to produce. Clicking Start Mail Merge opens a drop-down menu for Letters, Email Messages, Envelopes, Labels, and Directory.
If you want Word to guide you step-by-step, choose Step-by-Step Mail Merge Wizard. It opens a pane on the right and walks you through the sequence. I do not use the wizard every time, but it is useful when you have not worked with mail merge in a while, or if you want Word to keep you in the correct order.
What to do: For author tasks, you will live in Letters, Email Messages, and Labels. Directory is handy when you want a merged list, like a clean roster of your launch team with emails and roles.
Write And Insert Fields Group For Personalization
The Write & Insert Fields group is where the personalization happens. This is where you insert placeholders like First Name, Last Name, Address Block, Greeting Line, and custom fields.
For authors, this is the difference between “Hi there” and “Hi Mariah,” which instantly changes the tone of an email. Personalization is not manipulation. It is basic respect, and it reduces the chance a reader tunes you out because the message looks mass-sent.
What to do: Use Greeting Line when you want Word to handle name formatting, or use Insert Merge Field if you want tight control, like “Hi <<FirstName>>,” with your own punctuation and line breaks.
Preview Results Group For Spotting Errors Before You Send
The Preview Results group lets you click through individual records and see the final text with real names plugged in. This is where you catch things like “Hi,” when a first name is missing, or address lines that break awkwardly.
What to do: Preview at least ten random entries before you finish the merge. Check a few edge cases too, like hyphenated last names, all-caps data, and blank fields.
Finish Group For Printing, Editing, And Emailing
The Finish group is where you produce the deliverable. Finish & Merge lets you create a new merged document, print, or send email messages.
What to do: If this is important, create a merged document first. That gives you a frozen version you can review and archive. Direct printing is fine for low-stakes labels. Direct emailing is fine once you have tested the setup and trust your list.
Fast Path For Authors Who Immediately Need A Merge Done
If you have a deadline and you do not care about mastering the tool today, follow this sequence. It covers 95 percent of what writers need.
First, set up your data source. A simple Excel sheet works well. Use one row per person and one column per field, like FirstName, LastName, Email, Street, City, State, Zip, Genre, and Notes. Keep your column headers clean, with no fancy punctuation, no extra spaces.
Microsoft’s own documentation on preparing recipient lists highlights the practical point that Word pulls field names from your header row, so clean headers prevent weird field labels later. Microsoft Support’s mail merge overview shows what you need if you want the official sequence and supported data sources.
Next, in Word 2019, go to Mailings > Start Mail Merge and pick your type, usually Letters or Email Messages. Then click Select Recipients > Use an Existing List and choose your Excel file.
Then write the body text as if you are writing to one person. Drop merge fields where they belong. For email-style notes to your ARC team, I keep the first paragraph short and human, then I add the bullets. Mail merge is not a substitute for good copy.
After that, click Preview Results and step through records. Fix formatting issues now, not after you generate 300 messages.
Finally, click Finish & Merge. If you are printing letters or labels, create a merged document first so you can inspect it. If you are emailing, confirm your subject line, choose the Email field, and choose HTML if you are using basic formatting.
One realistic warning. Word 2019 can send merge emails through Outlook. However, it is not a newsletter service and does not manage unsubscribes, compliance, or deliverability the way email platforms do. If you are sending bulk marketing email, use your email service provider and follow their rules. The mail merge tool is best for personal operational email, not ongoing promo blasts.
Common Author Use Cases And The Buttons That Matter
Mail merge becomes easy when you tie it to real author tasks. Here are the ones I see most, and where I go on the Mailings tab for each.
ARC And Launch Team Emails
When you are sending ARC instructions, review reminders, or a launch day checklist, the field you care about is usually FirstName and maybe a private Notes field that holds what they agreed to do.
Use Start Mail Merge > Email Messages. Connect your list with Select Recipients. Insert <<FirstName>> at the greeting. Then preview hard. A missing name field makes your email look careless, and authors do not get many chances to ask for favors without friction.
If you want the message to feel personal, keep the first two lines free of heavy formatting. This approach also reads better on mobile.
Signed Bookplates And Shipping Labels
For bookplate label sheets, go to Create > Labels and choose the right Avery or equivalent template. Then use Select Recipients and insert the fields you need.
What trips people up is the “propagate” step. After you set up the first label, click Update Labels so Word copies the layout to every label cell. If you forget that button, you will merge one perfect label and then stare at a sheet of clones of the first recipient.
Personalized Letters For Agents, Bookstores, And Event Outreach
A mail-merge letter is for outreach that appears one-to-one while still saving your time. This works well for bookstore event requests, librarian pitch letters, and media mailouts where each person needs their own address block.
Use Start Mail Merge > Letters. Then Address Block and Greeting Line can handle formatting for you. I still prefer inserting individual merge fields when I want a very specific greeting, especially when contacting organizations and want to format “Hi Jamie” differently from “Hello Events Team” based on the data available.
If you want to keep your branding consistent across these letters, build the letterhead once and then merge into it. This is where your publishing identity matters in a small, practical way, the same way a clean cover matters at thumbnail size. I build a lot of those brand assets with Adazing tools when I am in production mode; then I keep the outreach documents plain and readable so the message does the work.
Troubleshooting When Mail Merge Feels Broken
When mail merge goes wrong, it usually fails in predictable ways. Fix the system once, then it stops being a recurring annoyance.
Mailings Tab Missing Or Disabled
If you cannot find Mailings at all, go to File > Options > Customize Ribbon and confirm Mailings is checked. If you are on a work-managed computer, your organization might lock down Ribbon customization. In that case, the tab should still be visible, but certain commands might be restricted.
Merge Fields Showing As Plain Text
If you see things like <<FirstName>> in the final output, you probably did not complete the merge. Preview replaces fields on screen, but the underlying document still contains merge codes. Use Finish & Merge to generate the final letters or emails.
Another possibility is that you typed angle brackets yourself. Merge fields have to be inserted using Insert Merge Field or related buttons. Hand-typed placeholders do nothing.
Numbers, Dates, And Zip Codes Looking Wrong
Excel and Word sometimes disagree about formatting. Zip codes can drop leading zeros. Dates can flip formats. Fixing this usually starts in your data source. In Excel, format Zip as text before you enter it, and format dates intentionally.
Microsoft documents the zip code problem in the context of mail merge and recommends formatting the field text in the data source to preserve leading zeros. You’ll learn more of this in the Microsoft Support guide on incorrect number and date values in mail merge.
If you are already merged and the output looks wrong, correct the spreadsheet and re-run the merge. Editing hundreds of merged pages by hand is how people end up hating mail merge.
Outlook Email Merge Problems
If you are merging to email, Outlook usually needs to be installed and configured, and Word needs permission to access it. Security prompts can appear. If you are hitting a wall, you can still finish the merge into a new document and then send in a different way, or move your outreach to an email platform designed for bulk sends.
I treat Word-to-Outlook merge as a tool for small, operational batches. For anything that smells like newsletter marketing, I keep it inside an ESP so unsubscribe handling and compliance are covered.
FAQs for Where Are the Mail Merge Options Located in Word 2019?
Which tab has mail merge in Word 2019?
The mail merge tools are on the Ribbon under the Mailings tab. If you do not see it, check File > Options > Customize Ribbon and confirm Mailings is enabled.
Where is the Step-by-Step Mail Merge Wizard in Word 2019?
Go to Mailings > Start Mail Merge, then choose Step-by-Step Mail Merge Wizard. It opens a right-side pane and keeps you in the correct order.
Can I do mail merge emails in Word 2019 without Outlook?
For true mail merge sending, Word 2019 expects Outlook for the send step. You can still merge your content into a new document and then paste or import the text elsewhere. However, Word’s built-in “send email messages” merge works through Outlook.
Mail Merge Is A Production Skill Worth Having
Mail merge is sitting in Word 2019 under the Mailings tab, and once you start treating it like a repeatable publishing task, it pays you back every time you run an outreach batch. Use it for the author jobs that are boring, frequent, and easy to mess up by hand, then keep your creative energy for the pages that readers actually buy.
